Introduction
How to get started with DoTreat!
This guide will help you to get started with DoTreat. This introduction will cover how to set up your salon and book appointments. If you have any questions or need assistance, always feel free to reach out to us!
Creating your salon
The first step to get started is to sign up for a free account and sign in. This will be a one-step process if you're using Apple, Facebook, or Google to sign in. If you're using email and password, select your password, confirm your email address by tapping the link in the email sent to you and sign in.
Once you are signed in, it's time to create your first salon. In the app, tap the Create new salon button to create your salon.
The calendar
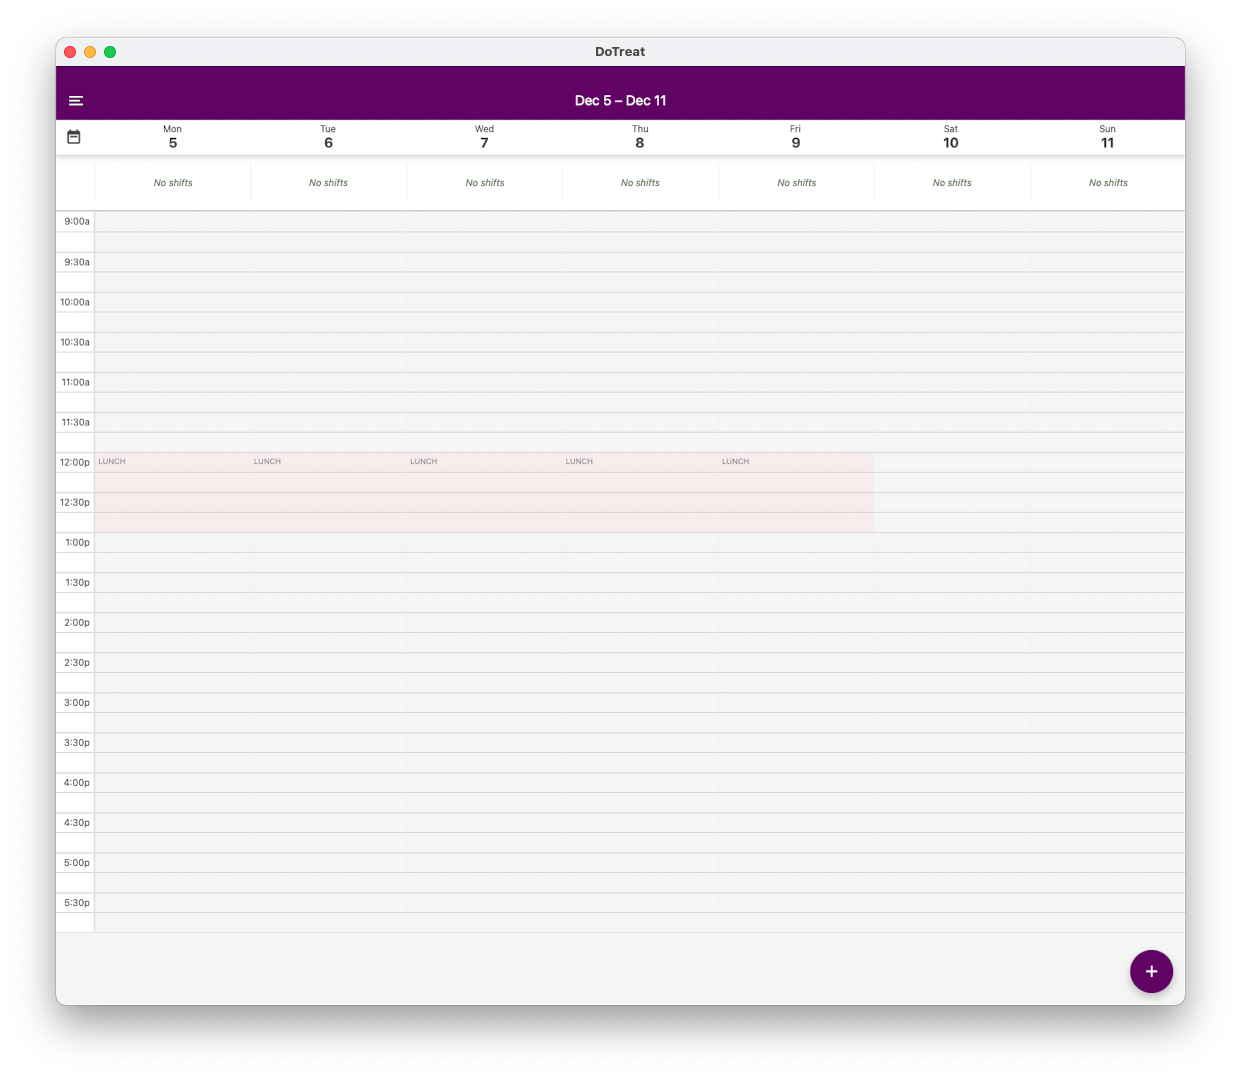
The first thing you'll see when you open the salon app is an empty calendar:
Adding a service
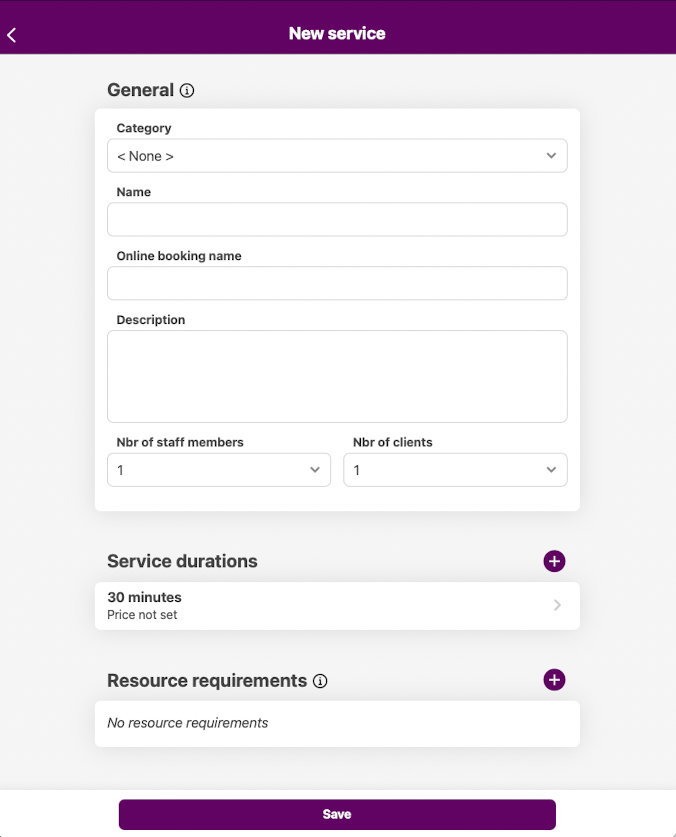
The first step is to add a service. Tap the menu button in the top left corner and select Setup. Continue into Services. Add a new service by tapping the plus button in the lower right corner and select New service. The screen will look like this:
In this example, we will add a 60-minute oil massage. To do that, we enter the following values:
- Category: We haven't added any categories yet, so we leave this at None. See the services page for a description of categories.
- Name: This is the name you and your staff will see in the calendar. We recommend you use a short name to keep the calendar easy to read. Here we write Oil Massage.
- Show in online booking: Enable this if you want the service to be bookable through the online booking homepage. Normally we want this service to be bookable, so we enable this.
- Online booking name: Your clients will see this name when they make appointments through the online booking homepage. Typically, you want to choose a more descriptive name here. Here we write Full Body Oil Massage
- Description: The description is also for the online booking homepage. Here, you can enter a more detailed explanation for your clients.
- Nbr of staff members: Since this is a service performed by one staff member only, we leave the value at 1.
- Nbr of clients: Since this is a service for one client only, we leave the value at 1.
- Service durations: In this example, we wanted the duration to be 60 minutes, so we need to change the default duration. Tap on the duration that says 30, which will take you to the service duration page. Here, you can change the duration value from 30 to 60 minutes. You can also assign a price if you'd like. Tap Save, to save the changes to the duration, which will take you back to the service page.
- Resource requirement: We won't be using resources for this service, so we'll leave this as it is. For information regarding resource requirements, check out the resources page.
You should now have a service type that looks like this:
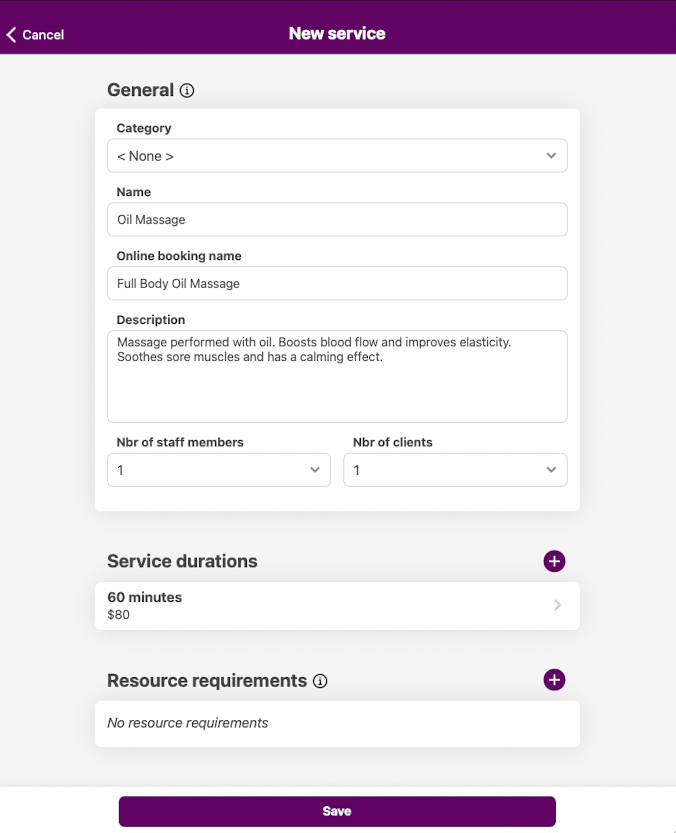
Save your service by tapping Save.
Adding a staff member
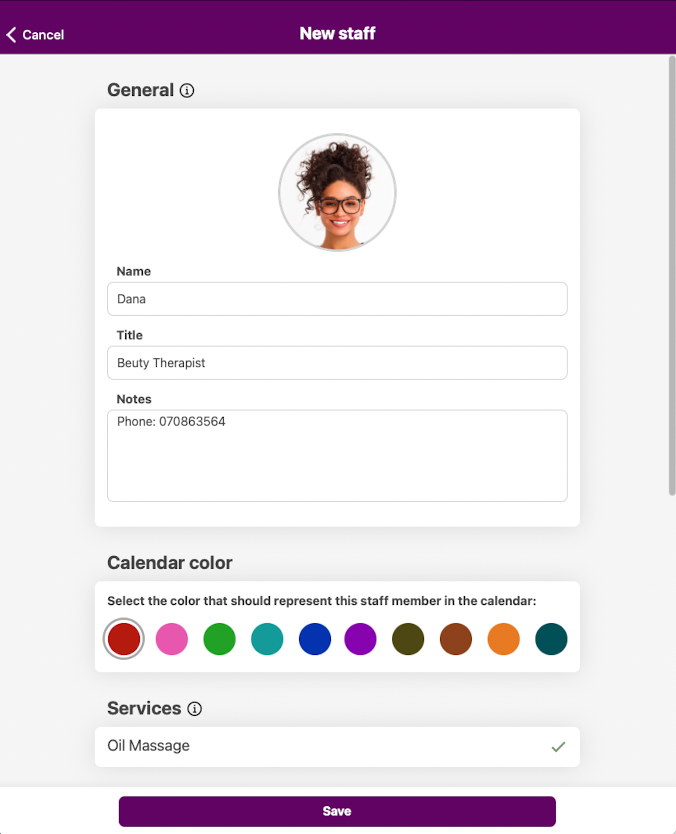
The next step is adding a staff member who can perform the service we just added. Move back out of the service page to the setup page and step into Setup > Staff. Tap the plus button in the lower right corner.
- Name: The staff member's name. It will be shown both in the calendar and on the online booking homepage, where the client can request a specific staff member. We recommend using a short name or a nickname rather than the full name.
- Photo: Here, you can upload a picture so your clients can see who is who when making an appointment on the online booking homepage.
- Calendar color: Choose the color that will be used for the staff member in the calendar.
- Services: Select all the services that the staff member can perform, so here we select the one we just created.
- Notes: Here, you can optionally write notes about the staff member. These notes will not be shown anywhere else than here.
- Automatic staff shifts: We'll be using manually created staff shifts in this example, so we leave these disabled for now.
The setup for your staff member should look something like this:
Adding a staff shift
The last step in preparation before making our first appointment is adding a staff shift, which is a straightforward procedure. Save the staff member and move back to the calendar using the menu button in the top-left corner. In the top of the calendar, tap the staff shift area (the area that says "No shifts") for a certain day. The staff shift page for that day will be displayed. Enable the staff shift for the staff member you created by tapping on the name of the staff member.

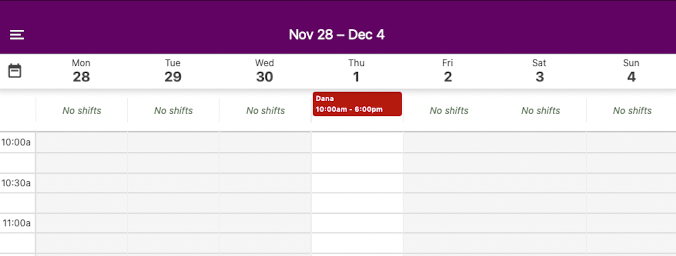
Tap Close. You can now see the new staff shift in the staff shift area:
Booking an appointment
Now we are ready to book our first appointment. Just tap and hold in any free space in the calendar. A new entry in gray will show up, which you can drag into the correct place. Release and select New appointment. The appointment window will then show up:
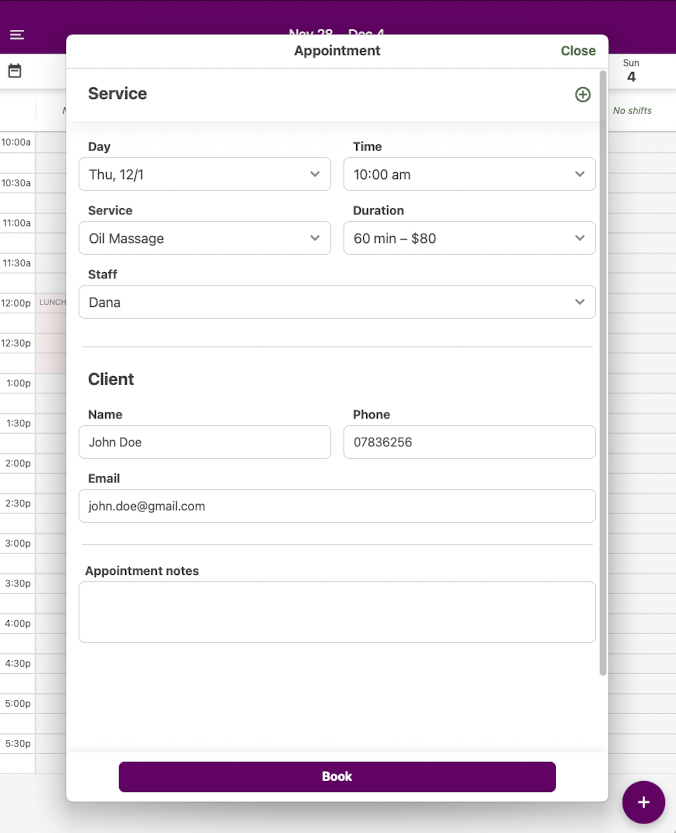
The different parts of the appointment window:
- The date of the appointment.
- The time of the appointment.
- The service type.
- The duration of the appointment. If you have multiple durations configured for the service type (e.g. 60 and 90 minutes), you select the duration here.
- The selected staff member. If the service type requires two staff members, you will have two staff members to select here.
Important: If the client has made the appointment through the online booking homepage and has requested a specific staff member to perform the service, the staff member's name will be enclosed by two dots, e.g., • Dana •. - The client information. If you are making the first appointment with a certain client, just fill in the values. If you have made previous appointments with this client, the system will automatically search as you type and let you select that client so that you don't have to input all the information again.
Just tap Book, and that's it! You have just booked your first appointment!